
How to setup Domain Email in Gmail
Integrating your domain email with Gmail offers numerous advantages that enhance your email management experience, making it more professional and efficient.
Firstly, having a domain-specific email address (e.g., yourname@yourdomain.com) improves your credibility and brand identity. A professional email address fosters trust among clients and partners, reinforcing your brand’s legitimacy compared to using generic email services like Gmail or Yahoo. Studies indicate that emails from custom domains are more likely to be opened and acted upon, which is crucial for business communications.
Secondly, Gmail’s robust features, such as advanced spam filtering, integration with Google Workspace apps, and a user-friendly interface, enhance productivity. You can access Google Drive, Google Docs, and Google Calendar, streamlining your workflow directly from your email platform. This integration supports effective team collaboration and communication, vital for businesses of all sizes.
Moreover, managing your domain email through Gmail allows for powerful email management tools, including powerful search capabilities, email organization using labels, and automated filters. These features help keep your inbox decluttered, enabling you to focus on what matters most in your professional correspondence.
In summary, integrating your domain email with Gmail enhances professionalism and provides access to powerful tools that improve efficiency and management, catering specifically to the needs of businesses and professionals alike.
Setting Up Hordanso cPanel Webmail
Configuring Hordanso’s cPanel Webmail to create your email account is a straightforward process. Follow these steps to ensure your email is properly set up and ready for use:
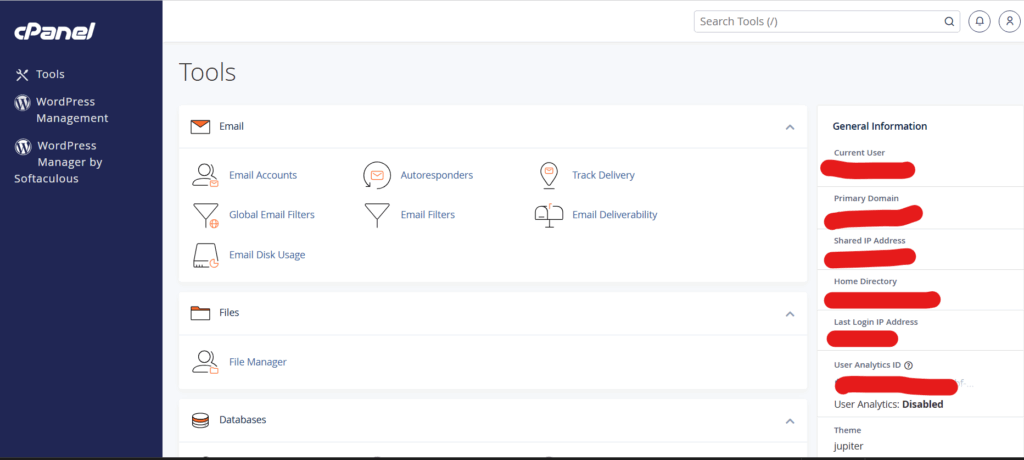
- Log in to Your cPanel Account: Start by accessing your Hordanso cPanel account through the provided URL, typically
https://yourdomain.com/cpanel. Enter your username and password to log in. - Find the Email Accounts Section: On the cPanel dashboard, scroll down to the “Email” section and click on Email Accounts. This will take you to the email account management interface.
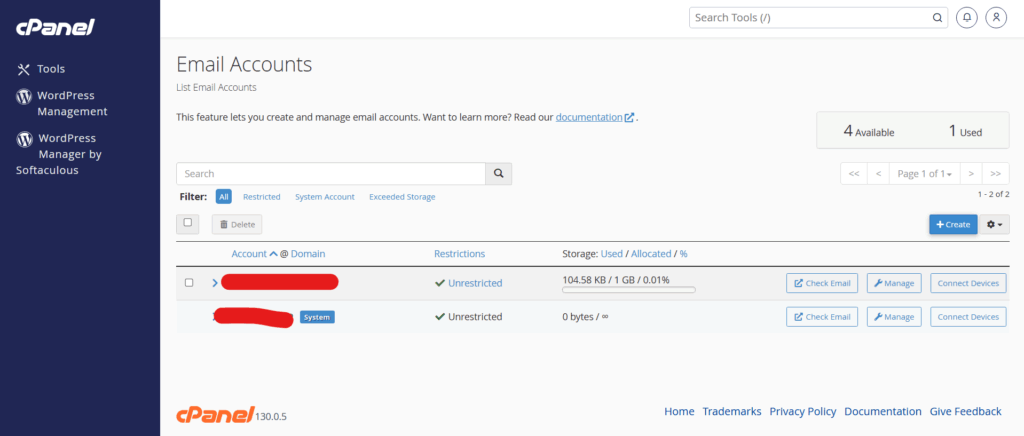
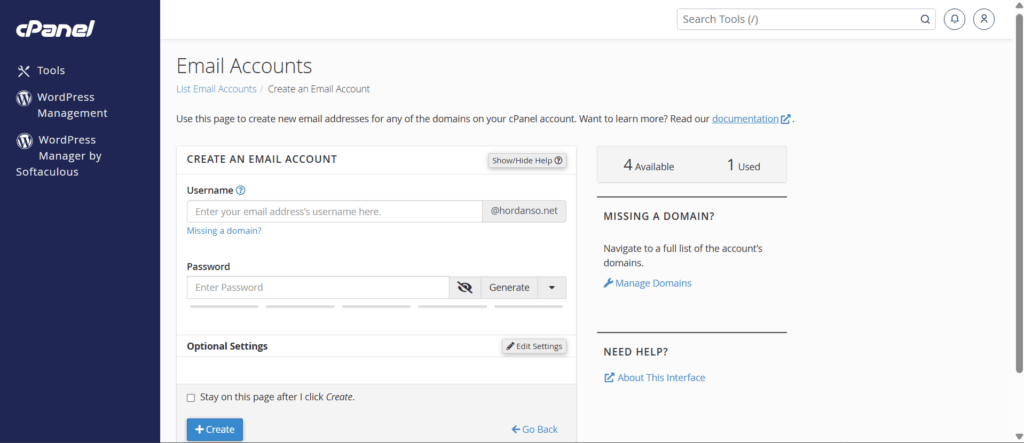
3. Create a New Email Account:
- Click the Create button to add email account.
- Fill in the required fields:
- Username: This will be your email address (e.g., info@yourdomain.com).
- Password: Choose a secure password. You can use the password generator for extra security.
- Mailbox Quota: Set a storage limit for the mailbox or leave it as default to allow unlimited storage.
- After filling in the details, click Create.
4. Configuration Settings: Once your account is created, configure email settings if you plan to use an email client (like Outlook or Thunderbird). Typically, you will require:
- Incoming Mail Server (IMAP/POP3):
- IMAP:
mail.yourdomain.com(recommended for synchronization across devices) - POP3:
mail.yourdomain.com(for downloading emails to a single device)
- IMAP:
- Outgoing Mail Server (SMTP):
mail.yourdomain.com - Use your full email address as the username for both incoming and outgoing servers
- Testing Your Configuration: Use a webmail client by clicking the Check Email icon next to your newly created account to access your webmail interface. Log in using the email account credentials you just set up.
5. Set Up Email Forwarding (Optional): If desired, set up email forwarding if you want emails sent to this address to be forwarded to another address.
Configuring Gmail to Send and Receive Domain Emails
To connect your domain email to Gmail and manage it efficiently from the Gmail interface, follow these configuration steps:
- Set Up Your Domain in Google Workspace
- Sign Up for Google Workspace: If you haven’t already, create an account at the Google Workspace pricing page.
- Verify Your Domain: During the setup process, you’ll receive instructions to verify ownership of your domain, usually involving adding a TXT record to your domain’s DNS settings.
- Configure MX Records
- Access Your Domain’s DNS Settings: Log in to your domain registrar (e.g., GoDaddy, Namecheap, etc.).
- Set Up MX Records: Replace your existing MX records with the following:
Priority: 1, Server: ASPMX.L.GOOGLE.COM
Priority: 5, Server: ALT1.ASPMX.L.GOOGLE.COM
Priority: 5, Server: ALT2.ASPMX.L.GOOGLE.COM
Priority: 10, Server: ALT3.ASPMX.L.GOOGLE.COM
Priority: 10, Server: ALT4.ASPMX.L.GOOGLE.COM
This change may take several hours to propagate.
- Configure Gmail Settings for Sending and Receiving Emails
- Log into Gmail: Go to your Gmail account.
- Settings Gear: Click the gear icon at the top right and select “See all settings.”
- Accounts and Import Tab: Click on the “Accounts and Import” tab.
- Add a Mail Account: Under the “Check mail from other accounts” section, click on “Add a mail account.”
- Enter Your Domain Email: Follow the prompts to enter your domain email address.
- Configure POP3 Settings:
- Username: Your full email address.
- Password: Your email account password.
- POP Server: Typically, this is
mail.yourdomain.com. - Port: 995 for secure connection.
- Label Incoming Messages: Check the option to label incoming messages for ease of sorting.
- Sending Mail as Your Domain Email
- In the same “Accounts and Import” tab, go to the “Send mail as” section.
- Click on “Add another email address.”
- Enter your name and your domain email address.
- Configure SMTP Server Settings:
- SMTP Server:
smtp.yourdomain.com - Port: 587 or 465 (for SSL).
- Username: Your full email address.
- Password: Your email account password.
- SMTP Server:
- Choose to use TLS or SSL for a secure connection.
- Click “Add Account.”
- Test the Configuration: After setting up, send and receive a few test emails to ensure that everything is functioning correctly.
Troubleshooting Common Issues
When setting up your domain email in Gmail, several common issues can arise, each with specific solutions to ensure a smooth experience. Here are some typical problems and how to resolve them:
- Email Not Sending or Receiving: If you encounter issues where emails cannot be sent or received, first check your internet connection. Ensure that the email server settings (like SMTP for outgoing and IMAP/POP3 for incoming) are correct. You can verify these settings through your domain host’s documentation or support page.
- Authentication Errors: Many users face authentication errors, usually related to incorrect passwords or security settings. Ensure that you are using the right password for your domain account. If you’ve enabled two-factor authentication (2FA), make sure to generate an app password for Gmail.
- Configuration Issues: Misconfigured settings can prevent proper functionality. Review all setup steps thoroughly, including adding the domain to your Gmail account and ensuring that you have followed the correct procedures for verifying your domain ownership. You can consult the Google Workspace support page here for step-by-step instructions.
- Missing Emails: If emails are going missing, check your Spam folder or any filters you may have set up in Gmail that could be archiving or deleting incoming messages. It’s also a good idea to check your domain’s email settings through your hosting provider to ensure nothing is misconfigured.
- Sync Issues Across Devices: Sometimes, emails may sync inconsistently across devices. Make sure that all devices are using the same email configuration settings and that email clients are up to date. This can also be a sign of connectivity issues; verify that each device has a stable internet connection.
- Records Not Propagating: After changing domain settings like MX records for email routing, it may take some time for the changes to propagate fully. Check tools like MXToolbox to monitor DNS propagation and confirm that your records are correctly set.
Following these troubleshooting steps should help rectify common issues encountered with domain emails in Gmail, providing a smoother communication experience.
Best Practices for Managing Your Domain Email in Gmail
Managing your domain email within Gmail can significantly enhance your professional communication and organizational efficiency. Here are key strategies and etiquette to keep in mind:
Organization Strategies
- Labels and Filters: Utilize Gmail’s labeling system to categorize emails effectively. Create labels for different projects or clients and set up filters to automatically label incoming emails. This makes it easier to find important messages later. For example, you can set up a filter that labels all emails from a specific client as “Client A” for quick access.
- Priority Inbox: Consider using the Priority Inbox feature to separate essential emails from less important ones. Gmail learns which emails you consider important over time and helps highlight them, ensuring you address crucial communications first.
- Archiving: Use the archive feature instead of deleting emails. This keeps your inbox clutter-free while allowing you to retain important communications for future reference. Archived emails can be easily searched, which is particularly helpful for retrieving older messages without overwhelming your inbox.
- Keyboard Shortcuts: Familiarize yourself with Gmail’s keyboard shortcuts to manage your email more efficiently. Actions like archiving, deleting, or moving emails can be done quickly, saving you time.
- Scheduled Emails: Take advantage of the scheduling feature to send emails at optimal times, especially if you’re dealing with clients in different time zones. This ensures your messages are received when they are most likely to be read.
Email Etiquette
- Professional Address: Always use your domain email to project professionalism. Having an email like yourname@yourdomain.com enhances your credibility compared to a generic email address. This is vital for business communication, as indicated in discussions about the importance of domain emails in professional settings.
- Clear Subject Lines: Ensure your subject lines are informative and relevant. A well-crafted subject line helps the recipient gauge the email’s purpose and urgency, which is crucial for effective communication.
- Conciseness and Clarity: Keep your emails succinct and to the point. Use clear language and avoid jargon unless you are sure the recipient understands it. This approach minimizes misunderstandings and maintains a professional tone.
- Polite Sign-offs: End your emails with appropriate sign-offs, such as “Best regards” or “Thank you.” Including your contact information in your signature can also make it easier for recipients to reach you and reinforces your professional image.
- Respond Promptly: Aim to reply to emails within 24 hours, even if it’s just to acknowledge receipt and indicate that a more detailed response will follow. Timely responses help build trust and respect in professional relationships.

